MICROSOFT POWER POINT
Most PowerPoint presentations are created to be run as a slideshow. Given all the advanced features available in PowerPoint 2010, it is no surprise that there are many features related to running the slideshow that have been included in this program too. Most of these features are really to help you create a good slideshow without having to go through the entire presentation over and over again after every minor change. Features related to running the slideshow are grouped under the Slideshow ribbon.

| Section | Menu Item | Description |
|---|---|---|
| Start Slideshow | From Beginning | Starts slideshow from beginning |
| From Current Slide | Starts slideshow from the current slide | |
| Broadcast Slideshow | Allows users to broadcast the slideshows using Microsoft's PowerPoint Broadcast Service | |
| Custom Slideshow | Builds a custom slideshow by picking the slides you want to run | |
| Set Up | Set Up Slideshow | Helps set up the slideshow including browser/ full screen display, show options with or without narration/ animation, pen and laser color during the slideshow and the slides to be presented during the show |
| Hide Slide | Helps mark/ unmark the slide as hidden, so it is skipped or shown during the slideshow respectively | |
| Rehearse Timing | Allows users to rehearse the timing on each slide and the entire slideshow | |
| Record Slideshow | Records the slideshow including narration and animation | |
| Slideshow Checkboxes | Helps set or avoid the use of narrative audio and rehearsed timings during the show. Display media controls in the slideshow view | |
| Monitors | Resolution | Defines resolution in slideshow view |
| Show Presentation on | Picks the monitor to display the presentation one - in case of multiple monitors | |
| Use Presenter View | Run presentation in Presenter view rather than just slideshow view |
PowerPoint offers animation support which can be used effectively to add some motion in a monotonous presentation and make it more interesting. Animation can be applied to any object on the slide and the motions can the automated, timed or trigger.
The following steps will help you add and preview animations in the slide.
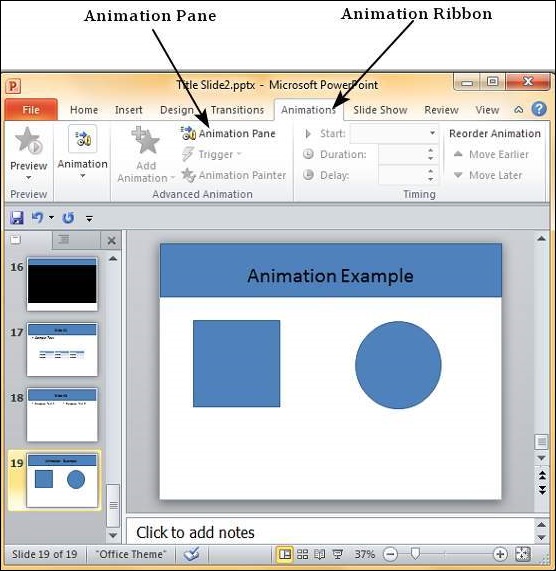
Step 1 − Go to the Animation ribbon and click on the Animation Pane to display the animation sidebar.
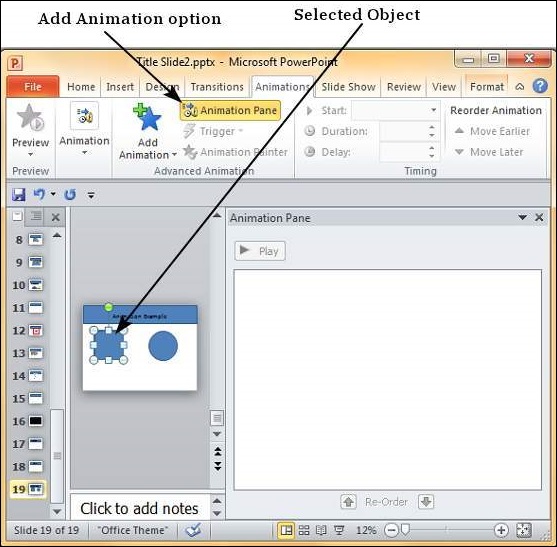
Step 2 − Select one of the objects in the slide and click on the Add Animation menu option.
Step 3 − Choose from one of the Animation options.
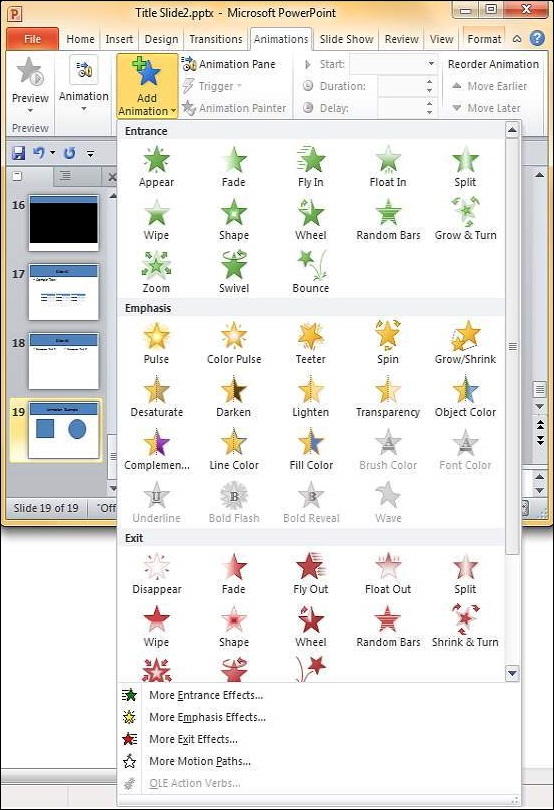
- Entrance will cause the object to appear in the screen.
- Emphasis will cause the object to emphasis without appearing or leaving the screen.
- Exit will cause the object to disappear from the screen.
Step 4 − Once you add the animation for an object, it will show up in the Animation pane.
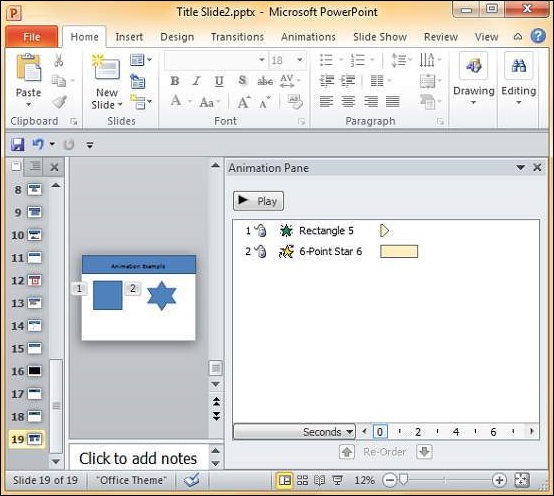
Step 5 − By default, all the animations are initiated by a click, but you can change this. To change the trigger, right-click on the animation object on the pane and choose an alternate trigger.
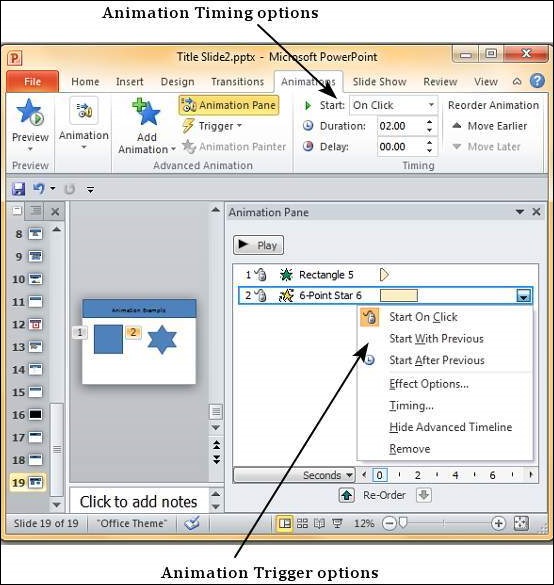
- Start On Click will cause the animation to start when you click the mouse.
- Start With Previous will cause the animation to begin with the previous animation; if this is the first object, it will begin as soon as you reach the slide during the slide show.
- Start After Previous will cause the animation to begin after the previous animation ends.
Step 6 − From the timing section, you can also manipulate the animation timings.
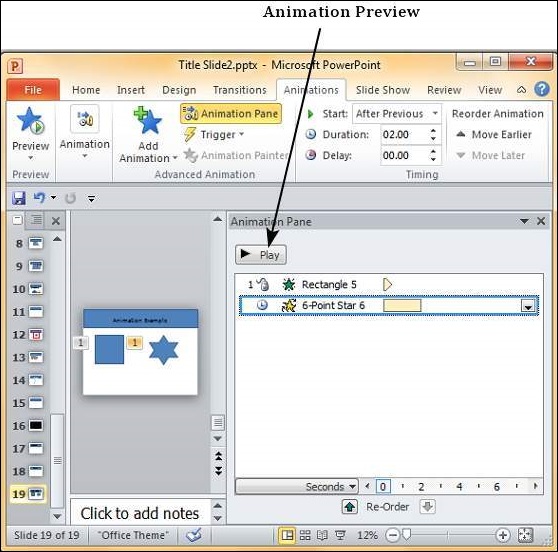
Step 7 − To preview the animation settings, just click Play on the animation pane.
PowerPoint allows presentations to be saved as video files that can be posted on video sharing platform like YouTube or just played on any other media.
Given below are the steps to save a presentation as a video file.
Step 1 − Go to the Backstage view under the File tab.
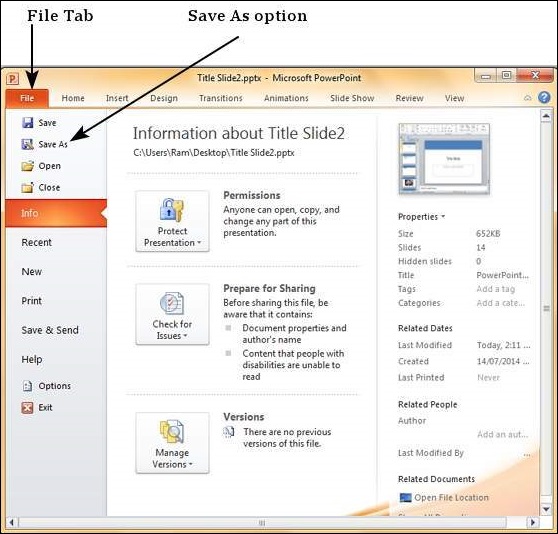
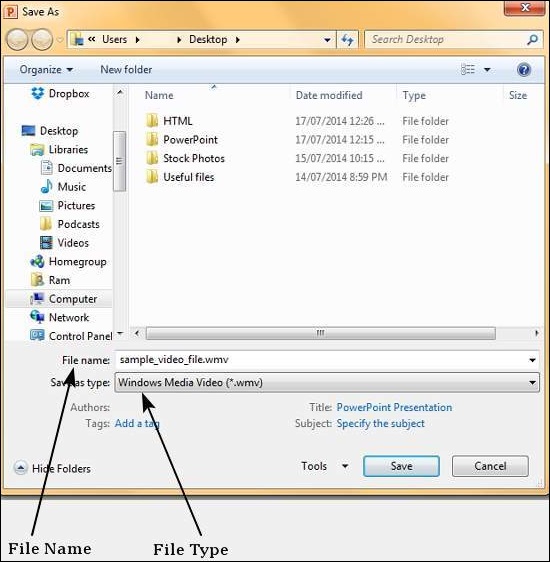
Step 2 − Click on Save As to open the Save As dialog.
Step 3 − Select the file type as .wmv from the list of supported file types.
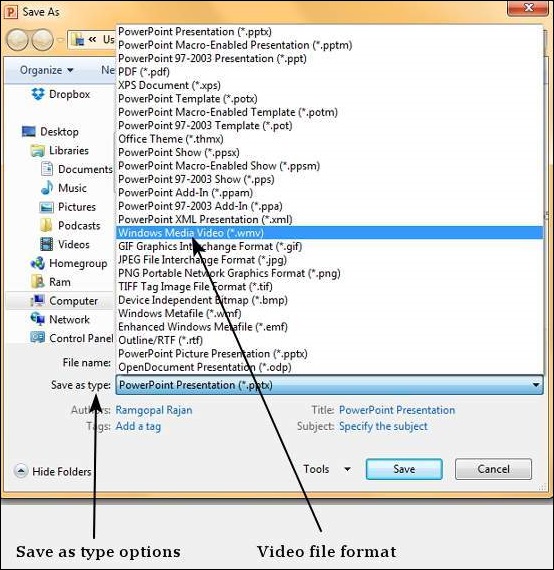
Step 4 − Add a proper name to the file and click Save.
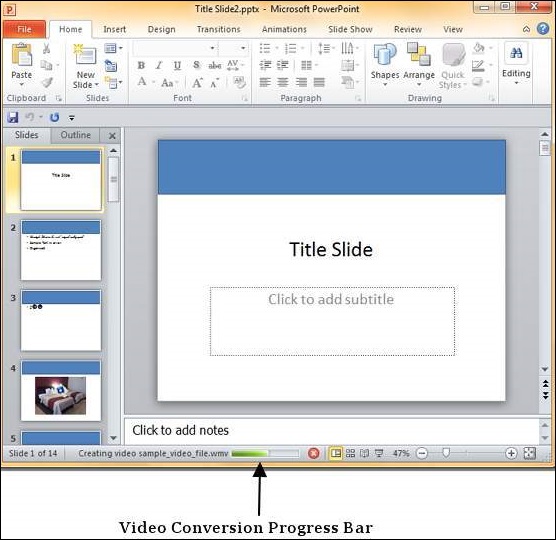
Step 5 − The video creation is not an instant process like other file types as PowerPoint needs to create the video file. You can track the progress of video creation at the bottom of your presentation window.
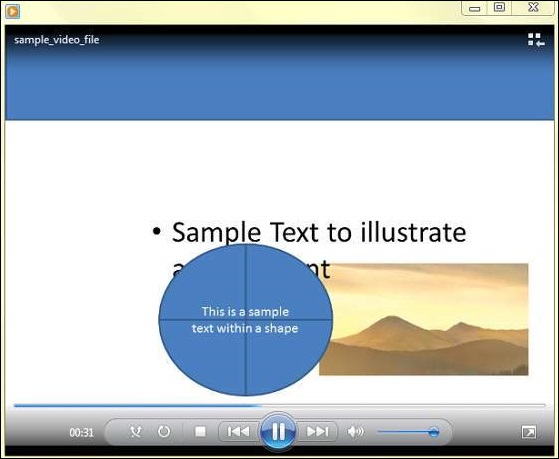
Step 6 − Once the creation is complete, the video file is created in the specified location.
Comments
Post a Comment